Optimise Ultrasound Frequency & Focal Zone in Vet Imaging
May 01, 2025
You've found the liver, centred in on the gallbladder, adjusted the depth and gain—and the image is okay. But it's not sharp, not textbook sharp. It does the job for the clinical question, but when you compare it to those crisp examples in your training materials or textbooks, it just doesn't hold up.
Is it down to your machine, or is there something else at play?
Often, it comes down to two simple settings: your focal zone and your frequency. Both are based on solid physics principles and together have a massive impact on image clarity and your confidence in what you're seeing. In this post, I'll explain what these settings are, how they work, and how to adjust them for optimal imaging in your veterinary practice.
What are Focal Zone and Frequency in Veterinary Ultrasound, and Why Do They Matter?
Before we dive into adjusting these settings, let's understand what they are and why they're so crucial for quality diagnostic imaging.
Understanding the Focal Zone
When an ultrasound beam travels through tissue, it doesn't maintain the same shape. It begins wide, narrows to a tight point, and then spreads out again. That narrowest part is your focal zone—and it's where the magic happens.

Even though we're looking at a two-dimensional image on our screen, ultrasound waves are three-dimensional. What you see is actually an average of what's happening through the thickness of the sound beam at any given depth. The narrower the beam at the structure you're trying to image, the more accurate your image quality will be. You reduce the amount of averaging needed, and your image becomes much more precise and detailed.
The focal zone is where your lateral resolution is best. That means it's where the machine can best distinguish between two structures that sit next to each other (side by side) at the same depth.
Correct Position

Position too high

Understanding Ultrasound Frequency
Ultrasound frequency is measured in megahertz (MHz)—sound waves per second. Here's the trade-off that every vet should know:
- Higher frequency = shorter wavelengths = better resolution
- Higher frequency = shallower penetration (gets absorbed quickly in tissue)
It's a bit like choosing between reading glasses and distance glasses:
- High frequency is like reading glasses: incredible clarity for close objects, but everything far away is a blur
- Low frequency is like distance glasses: you can see further, but you lose some detail
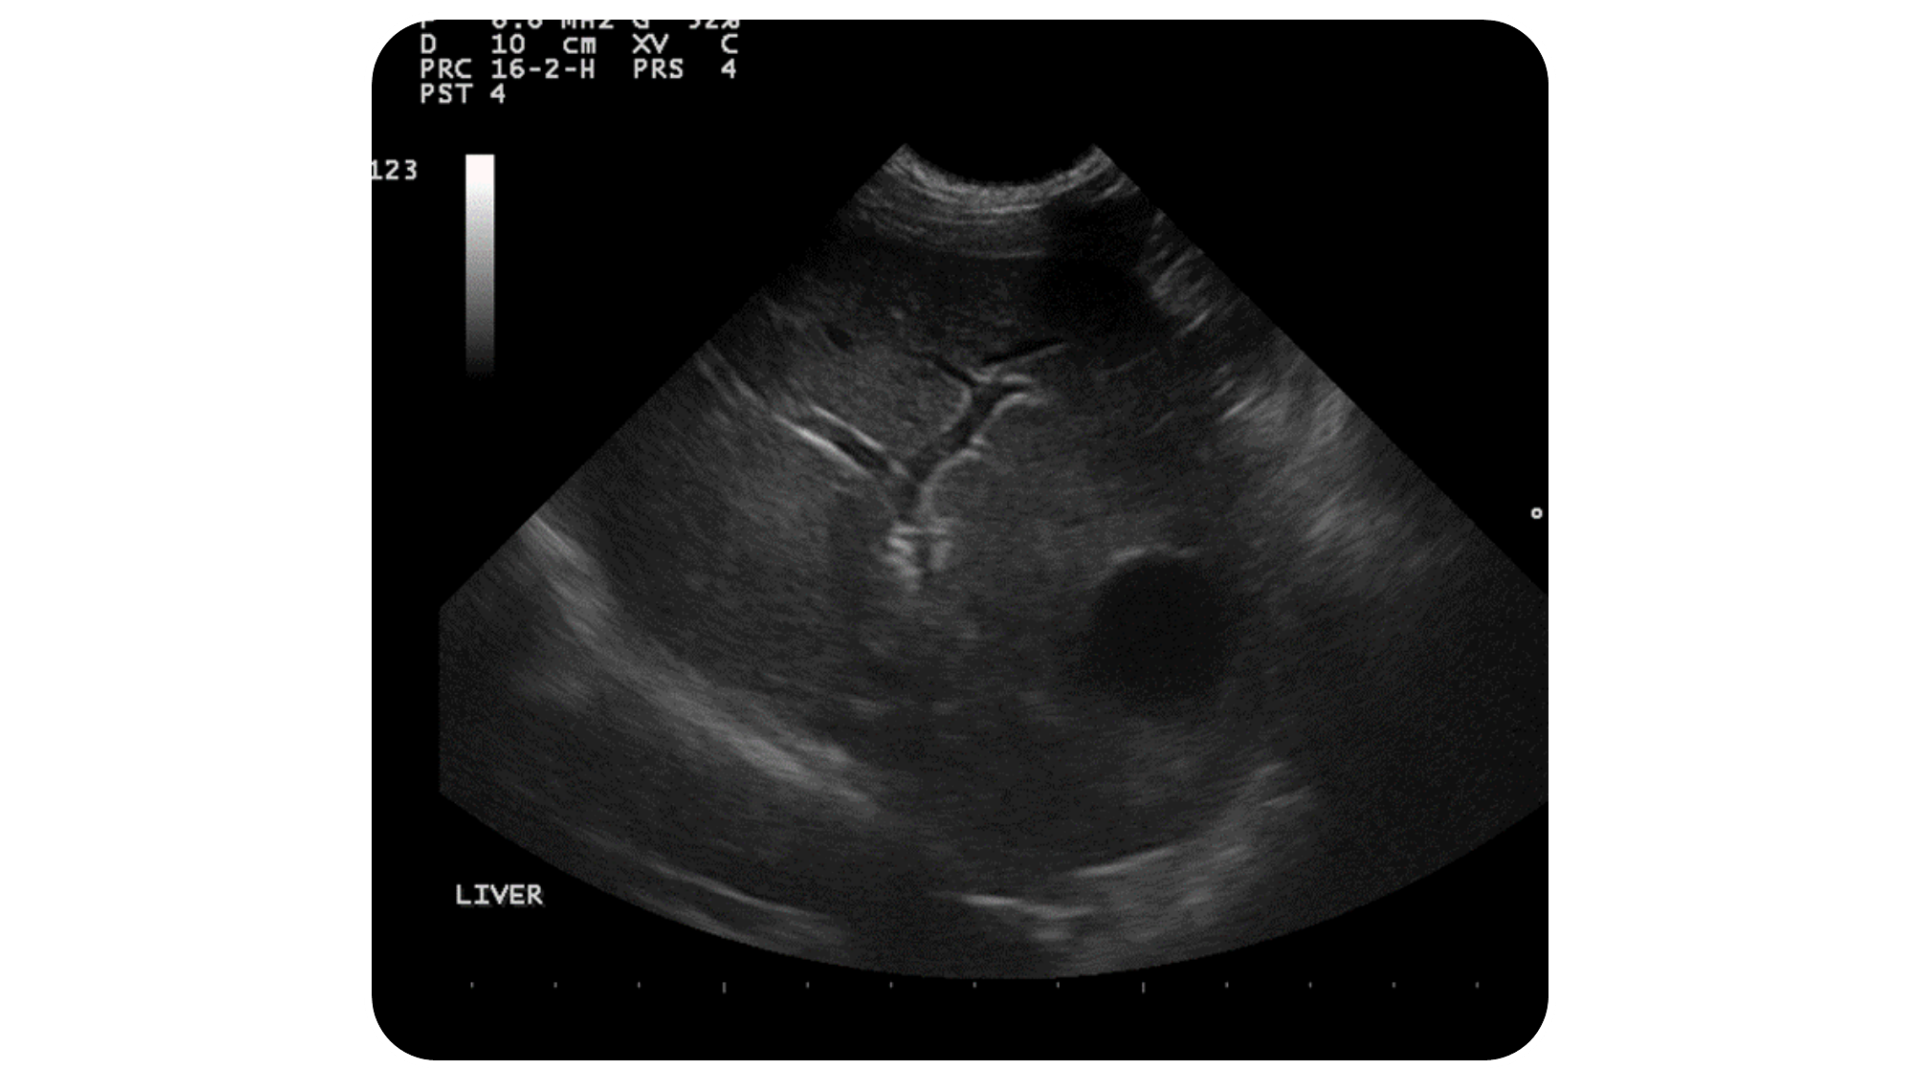
In this image we can see the near field (closest to the probe at the top of the image) is crisp and clear because we are using a high frequency. However, that high frequency is not penetrating well to the bottom of our image, leaving the liver looking blurry and unclear.
How to Adjust Focal Zone and Frequency for Optimal Veterinary Imaging
Now that we understand what these settings do, let's look at how to adjust them for the best possible images during your scans.
How to Position Your Focal Zone Correctly
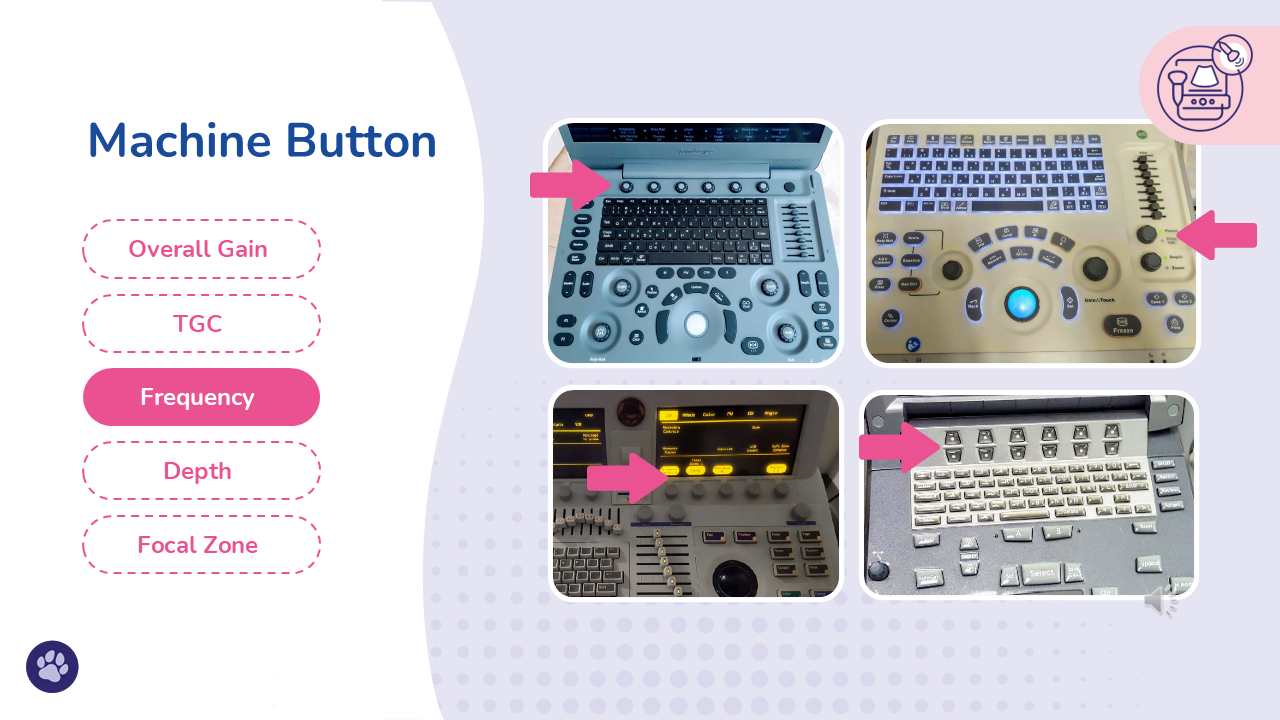
On most ultrasound machines, the focal zone is marked with a triangle or chevron on the edge of the image. You can move it up or down using:
- The trackball
- A button labelled "Focal Zone" or "Focal Position"
Best practice: Place the focal zone at or just below the structure you're interested in. That's where you'll get the most diagnostically useful image.

Some machines allow you to set multiple focal zones. While this can be useful, remember that more zones means a slower frame rate. For anything moving—like the heart or a panting animal—stick to one focal zone to avoid frustrating delays and image blurring.
How to Select the Right Frequency
Most ultrasound probes let you toggle between frequency presets. You might see:
- "Res" for resolution (high frequency)
- "Gen" for general (mid-range frequency)
- "Pen" for penetration (lower frequency)
Other machines let you directly choose the megahertz (5, 7.5, 10, etc.).
Best practice: Use the highest frequency that still reaches your target structure.
- Use high frequency for: Superficial structures, cat abdomens, bladder walls in small dogs, or even eyes
- Use low frequency for: Deeper structures like the liver in a deep-chested dog or the kidneys in a large breed
If you go too high and your structure disappears into shadow or haze, simply drop the frequency down a notch.
Tips and Reminders for Optimising Ultrasound Image Quality
- Check both settings for every scan: Get into the habit of adjusting both focal zone and frequency based on the specific structure and patient you're examining. It only takes seconds but makes a tremendous difference.
- Start high, then go lower if needed: With frequency, it's better to start high and decrease if penetration is poor, rather than starting too low and missing fine details.
- One focal zone is often better than many: While multiple focal zones might seem ideal, they significantly slow down your frame rate, which can be problematic when scanning moving structures or fidgety patients.
- Match your depth to your focal zone: If your machine won't let you move the focal zone, adjust your depth so your structure of interest lands where the focal zone already is.
- Practise makes perfect: Pick one structure—maybe the spleen, a lymph node, or an adrenal gland—and try scanning it with different focal zone positions and frequencies. Compare your images to see the difference.
Learning the basics of focal zone positioning and frequency selection isn't advanced ultrasound—it's fundamental. These aren't complicated settings reserved for specialists; they're everyday tools that make a huge difference in how clear, detailed, and diagnostic your images are.
The next time you're faced with a less-than-perfect ultrasound image, don't immediately blame your machine or your technique. Take a moment to check and adjust these two simple settings. You might be amazed at how much clarity you can gain with just a few small tweaks.
Remember, ultrasound is a skill that improves with deliberate practise and understanding the physics behind it. By taking control of your focal zone and frequency settings, you're one step closer to getting those textbook-quality images in your everyday practice.
Want to Get Better Results From Your Practice's Ultrasound Machine?
If you've found this helpful, you might like my course 'Veterinary Ultrasound: The Basics'. The course covers machine settings in much more detail, showing you exactly how to get the best from your equipment.
What I've found is that most ultrasound courses teach you on the latest high-spec machines, which doesn't help when you get back to practice and face your own (possibly older) equipment. In my course, you'll learn and get feedback on images from YOUR machine - the one you use every day.
Join 'Veterinary Ultrasound: The Basics' Course - Learn on YOUR Machine
Dr. Camilla Edwards is a peripatetic veterinary ultrasonographer and founder of First Opinion Veterinary Ultrasound (FOVU). With nearly 20 years of experience in general practice and over 10 years in veterinary ultrasound, she's passionate about making ultrasound accessible and practical for everyday veterinary practice.
